
In today’s post, we are going to talk about how to do advanced photo editing in the backend of WordPress. This technique will allow you to crop and resize images in your posts or pages, as well as optimize images for faster loading times.
How to Edit Images in the Backend of WordPress?
If you want to edit an image, click on the “Edit” button. On the Edit screen, you will see all of the current images in your blog. These are displayed in the order that they appear in your template. You can also add images from outside of your blog. The first option will let you browse for images on your computer. You can also upload a picture from a URL. The second option will let you browse your Dropbox or Google Drive. Click the “Choose File” link to upload your image.
To edit an image, click on the thumbnail of the image you want to edit. A screen will pop up and let you crop or resize the image.
Using the Advanced Image Editor
The advanced image editor is very powerful. It can be used to create an endless number of different effects on images. This includes adding filters, applying special effects, changing colors, and even making things disappear. There are many different tools available in the advanced image editor.
Some of the most common ones include the blur tool, the clone tool, the eraser tool, the heal tool, the liquify tool, the paintbrush tool, the rotate tool, the scale tool, the stamp tool, the text tool, the warp tool, and the zoom tool.
Image Editing Techniques
1. Download Free Presets
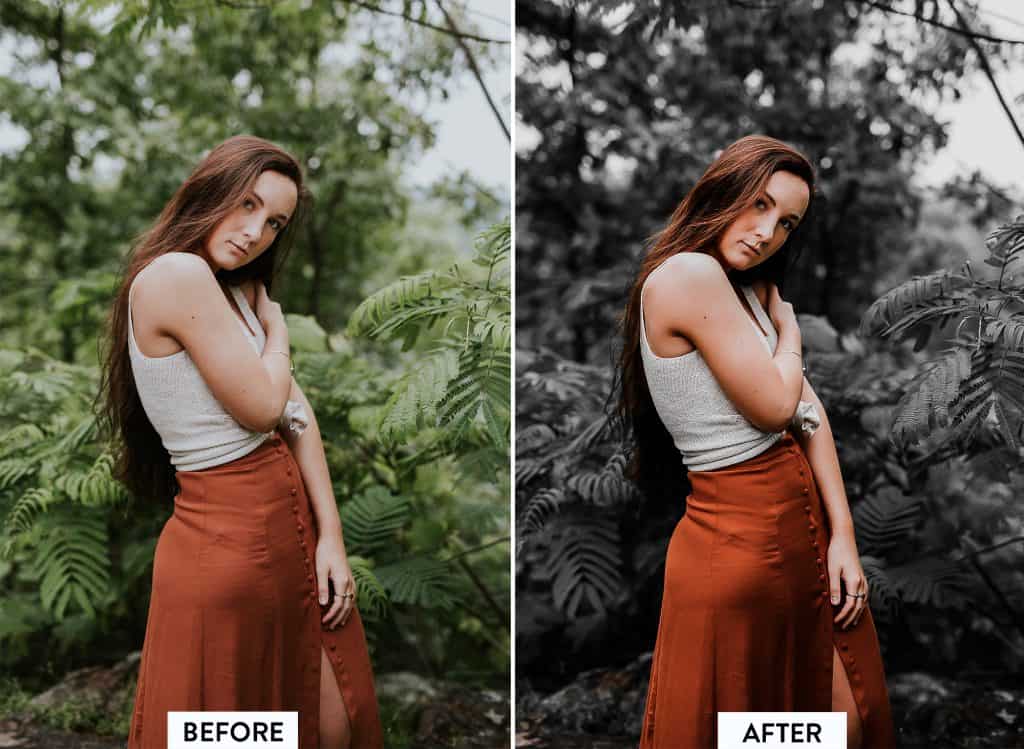
There are many free presets available online. All you have to do is go to the website where you found them and download them. Some people think that all you have to do is save the image and that it is ready to use. This is wrong. You will have to make changes to the image if you want to make it look really good. It will not work if you just save the image with no changes. You will have to apply the preset.
2. Adjust the White Balance for Accurate Colors
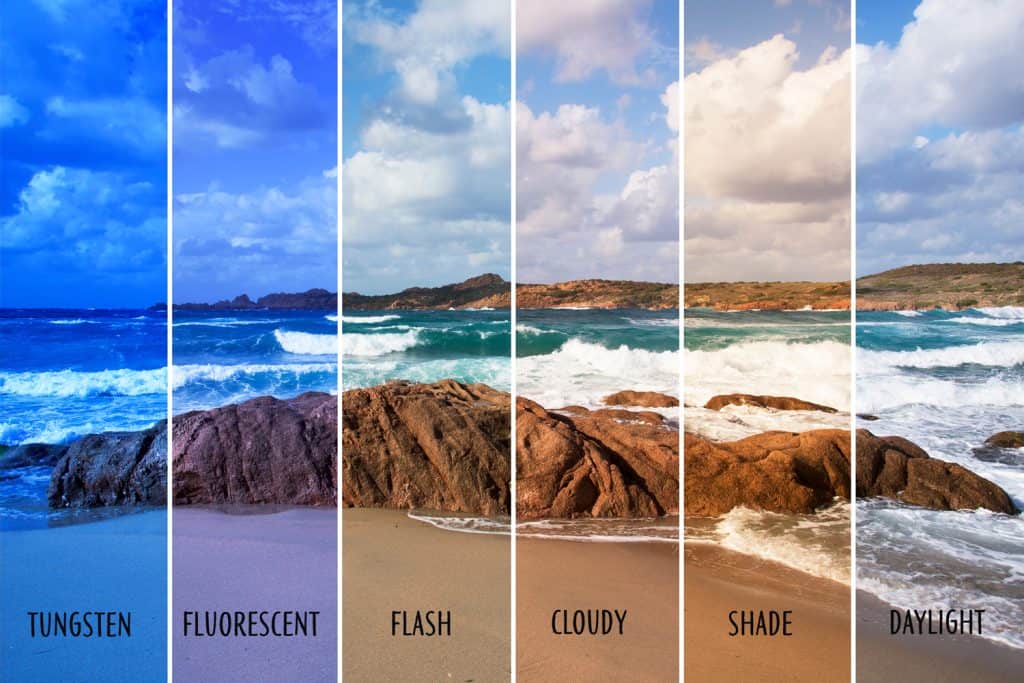
The white balance is the temperature at which your camera sets. It determines the color temperature of the white. In this case, you will have to adjust the White Balance.
You can do this by going to the main menu, choosing white balance, and then adjusting the temperature until you get the colors that you want. Once you are done, click save and you are ready to use the image. You can do this in a JPEG, TIFF, or RAW file.
3. Crop the image for Better Composition
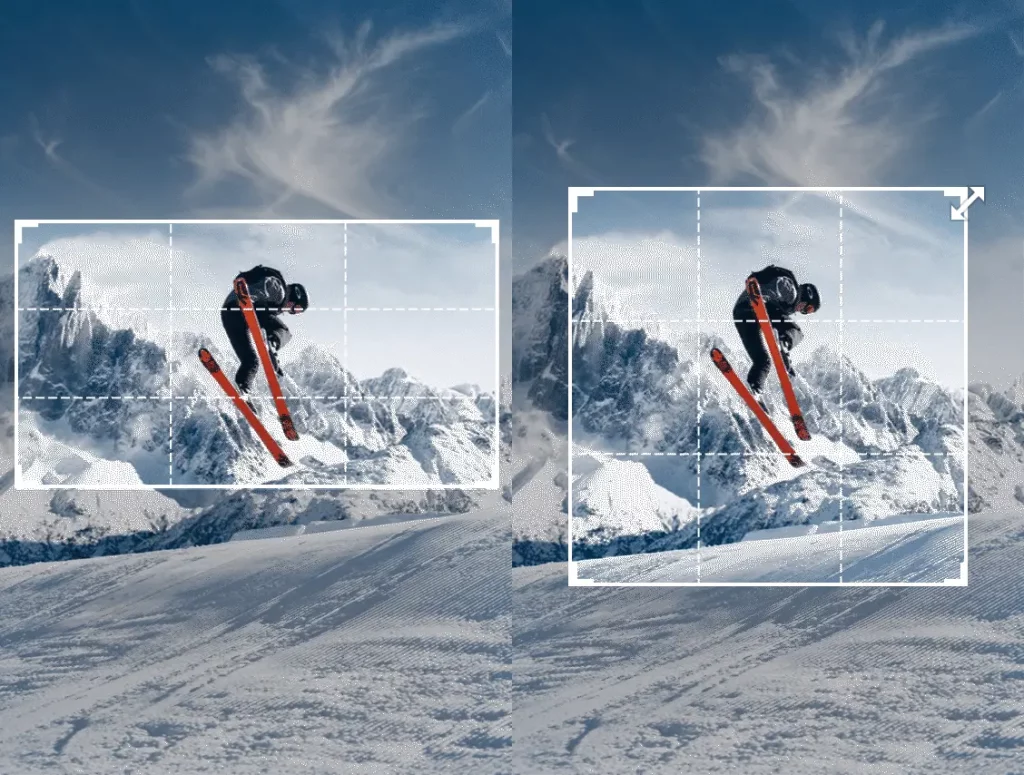
Crop the image for better composition and make it look better. You can crop your image using different methods. One method is to use the main menu to choose to crop and then crop the image.
You can also use the main menu to crop the image and you can select the various tools that are available. You can also crop the image manually. Cropping is a very useful function. You can use this function to change the size of the image.
4. Correct the Exposure
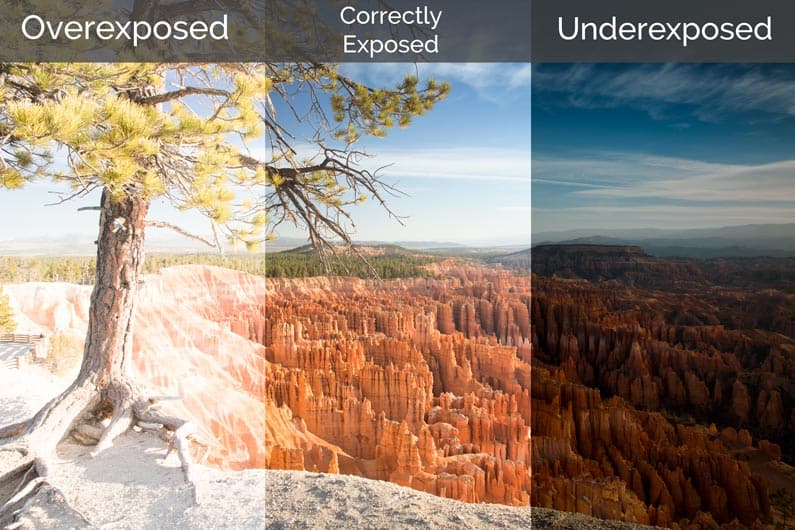
To get the exposure right, you can first make sure that the picture is set correctly in the camera. Once you have done that, you will need to check the exposure setting. In the Exposure Settings area, you will need to make sure that the value next to Exposure Compensation is correct.
This will give you more control over the exposure. You can also increase the Exposure Compensation value to make the picture brighter or decrease it if the image is too dark.
5. Adjust the Contrast
In the Adjustment Settings area, you can adjust the image’s contrast. You can do this easily by selecting the adjustment tool and choosing the left, right, top, or bottom point on the screen. You can adjust the Contrast setting to make the picture lighter or darker.
You can use the Contrast Setting to correct problems with exposure and color. You can also use it to fix mistakes in focus. If you use this feature carefully, you will get the right exposure in pictures and video clips. You should also use this function to fix mistakes in focus.
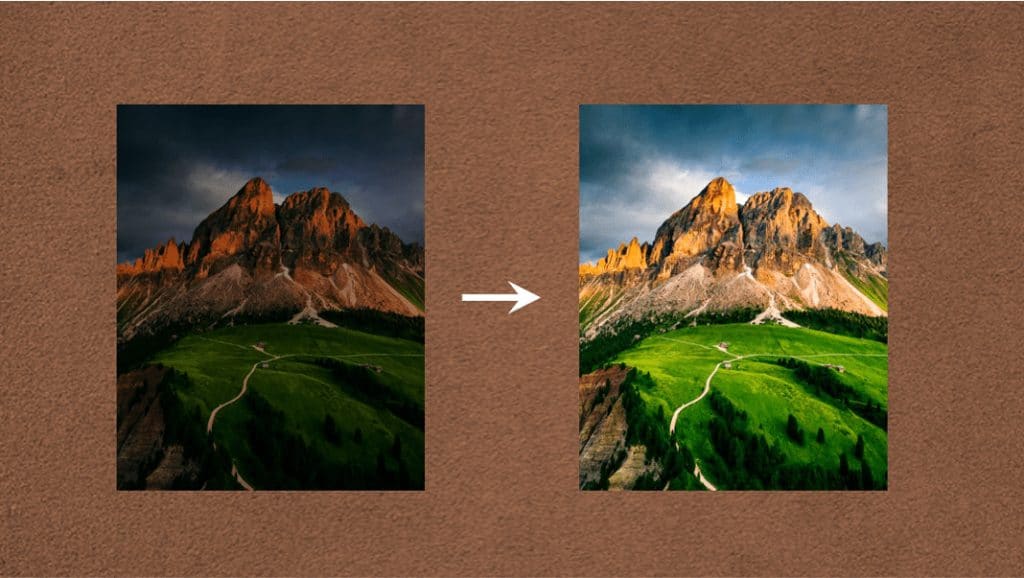
6. Adjust the colors’ Vibrancy & Saturation
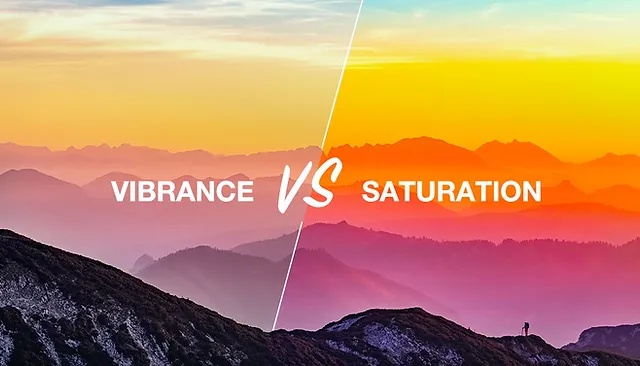
You can use the Colors’ Vibrancy & Saturation to change the brightness or darkness of a picture or video clip. This can be helpful if the picture is too bright or dark. You can also use this function to correct mistakes in an exposure.
If the exposure is too light, you can change the image to make it darker. On the other hand, if the exposure is too dark, you can change it to make it brighter. You can also adjust the brightness of a picture using the Exposure slider.
7. Remove Distracting Elements
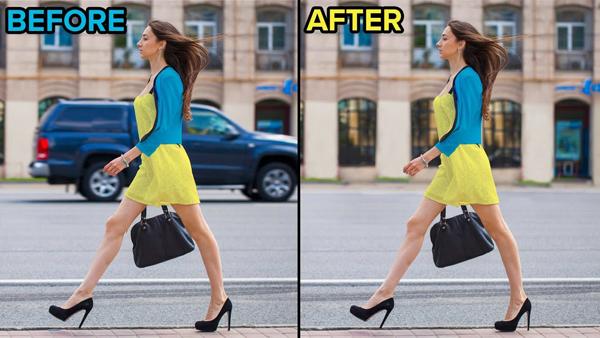
It is good to remove distracting elements from a photo when you are taking it. A good example of such an element is someone’s hair. You can use the Eraser tool to remove something like this. You can also use the Pencil tool to draw directly over a distracting element.
If you are taking a photo of something that moves around a lot, you will want to make sure that you are using a tripod so that you can stabilize it. There are different ways to fix this. One way is to use the Layers button and click on the lock icon. This will lock the moving object on a layer and prevent it from moving.
8. Improve the Sharpness of the Details
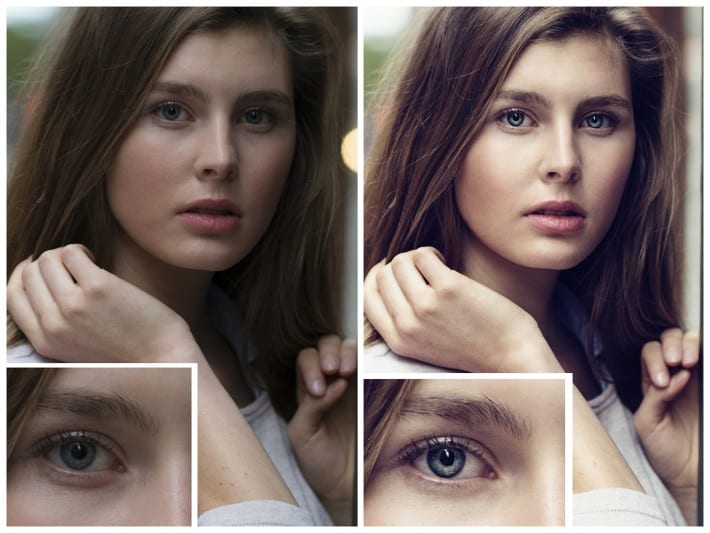
You can use the eraser tool to make your drawing look sharper. You can also use the pencil tool to draw directly on the area that you don’t want. Make sure you draw your lines with a thicker line. You can make a white space between the elements that are too close together.
If you want to correct a mistake that you have already made, you can use the undo tool. This will allow you to undo previous actions. It is a good idea to use the copy-and-paste option. This will allow you to copy the content of one layer and put it on a separate layer.
9. Optimize Photos for the Web
It is something that all photographers should know how to do. The first step that you should take when optimizing your photos for the web is to set the right file size for your photos. You can also change the aspect ratio of your photos to get rid of the black bars on your images. You should check the color balance of your photos to make sure that they look correct. You should make sure that your photos are not too dark or too light.
10. Outsource your Photo Editing to Professionals
You can do your editing yourself, but you might end up spending a lot of time on the task. This could be a big waste of your time. You should consider outsourcing your photo editing work to a professional company. They will do the task quickly and efficiently. They will also do it correctly. They will ensure that your pictures look exactly how you want them to look. You can trust professionals to give you what you need.
Conclusion
In conclusion, if you are looking to create an attractive blog or website, you need to learn to use some of the best photo editing tools. They will help you to make your blog or website look better. You can also use these tools to edit your photos to make them look more professional.