You have successfully installed Google Tag Manager (GTM) on your website…
If not, check this article on “How To Install Google Tag Manager (GTM) On A Website“
Now, You want to manage all of the marketing tags at one place and currently you want to install “Google Analytics”…
Let’s Start –
1. Go To "Admin" Area In Google Analytics and Click on "Tracking Info"
2. After Clicking On "Tracking Info" - Click On "Tracking Code"
3. Now, Copy The "Tracking ID" Not The Whole Code
Remember, You only need the “Tracking ID” as GTM has inbuilt template for “Google Analytics”.
Now, Let’s Move To “Google Tag Manager (GTM)” Account
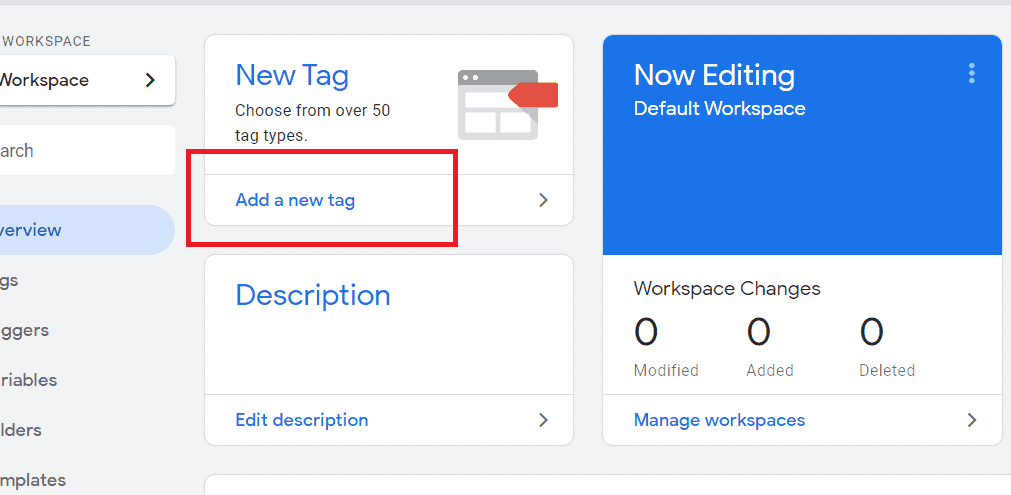
4. Open Your GTM Account and Click On "Add A New Tag"
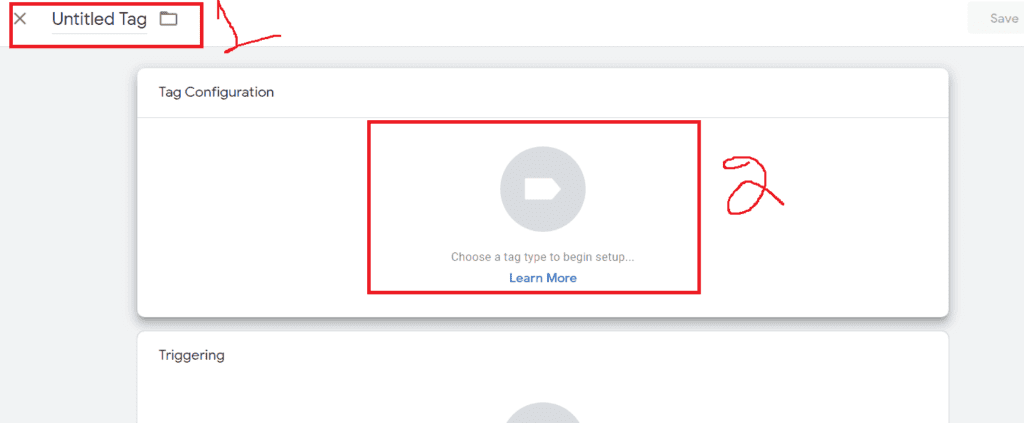
5. Name Your Tag and Click On "Tag Configuration"
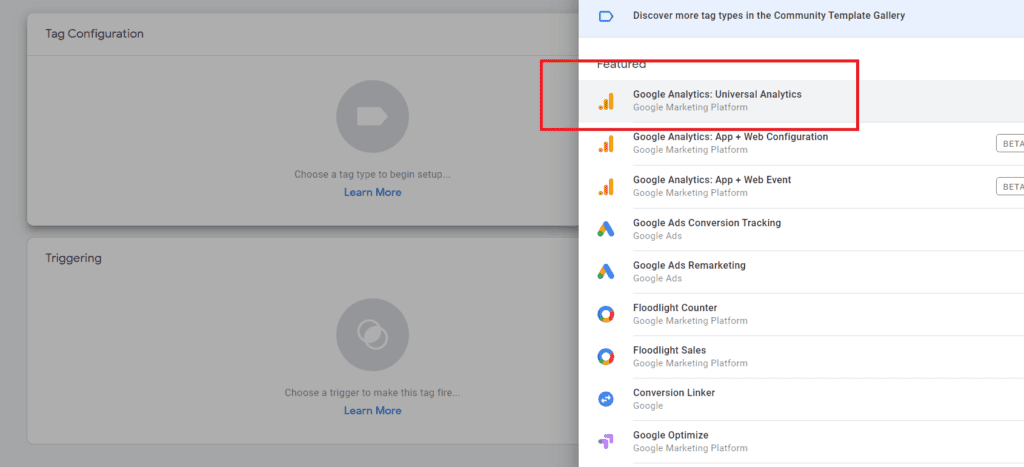
6. Choose "Google Analytics: Universal Analytics"
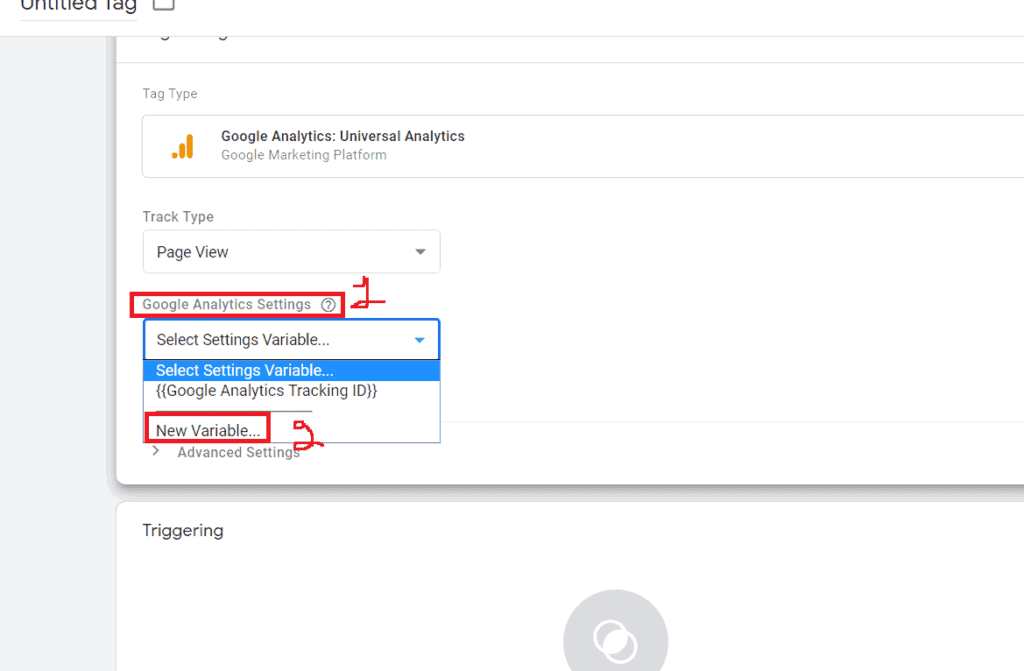
7. Selecting Variable
Under “Google Analytics Settings” – Click On “New Variable” as this is your first time and we will create a new “Google Analytics” variable.
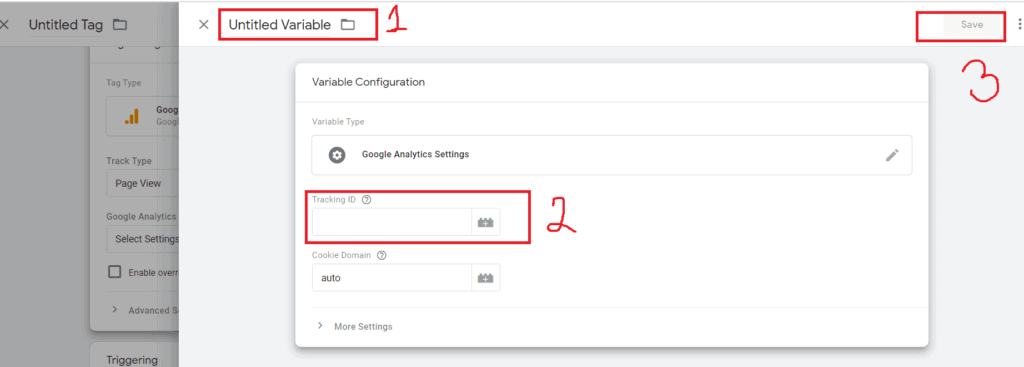
8. Google Analytics Variable Settings
Now, Name your variable “Google Analytics” so that you can remember that in future,
and put your “Tracking ID” which we copied from “Google Analytics Account” earlier.
And Then, click on save.
9. Now, Click On "Triggering"
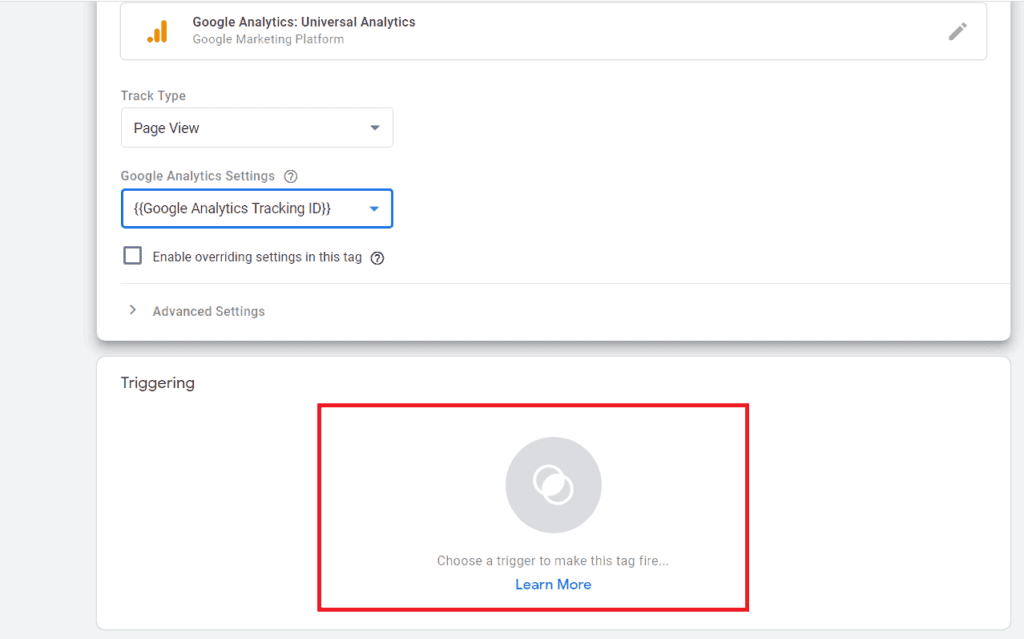
10. Select "All Pages" and Click "Save" After That

As soon as you will click on the “Save” Button, you have successfully installed the code.
Now, We Just Need To “Publish The Container”.
If you have no idea how you can “Publish The Container” – Read This Post.
Congratulation, You have successfully installed the Google Analytics Code On Your Wbeiste Through GTM.

